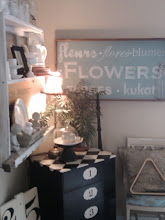
As promised, here is a tutorial on how I paint my diamonds. There may be other more "proper" ways, but this works the best for me. First find something to paint on. I have this end table that I wanted to do in white and aqua. You will need to find a ruler or a piece for wood. I prefer using a longer piece of wood so that it will go the full length of the furniture. Mine is 4 inches wide, that seems to create the best sized diamond.

First, lay the piece of wood from corner to corner and trace both sides with a pencil.

Move the board down, lining it up to the previous pencil mark. Trace the other side.

Repeat that until you reach the end the the funiture

Go back the the center, line the board up to your pencil mark and do the same thing.


Go back to the center and go corner to corner on the opposite side. Trace the board again on both sides. This is how you will create the diamond.

Move your way across the furniture again.


Once you have done that, as you can see you have created identical diamonds.

I usually mark with an "x" the ones that I will be painting.

You could just paint the diamonds free hand but I prefer clean lines, so I tape mine. I place the tape on the outside of the lines I am painting.

Grab your paint.

Paint them in.

Remove your tape and allow time for your paint to dry before painting the other diamonds.

Tape off the remaining diamonds, and paint.

Once your done, you can enjoy a beautiful hand painted piece of furniture.
.JPG)
.JPG)
I would love to see all your finished diamond projects. Of course if you have any questions, just ask.


.jpg)


.jpg)


.jpg)


.jpg)


This is great, Christina; thank you! I don't have anything at the moment, but you can be sure I'll be looking for something to paint at the thrift store. I am guessing the tape helps with those nice crisp lines. I would need to do that anyway as I am a shaky person to begin with. I'd wind up with a chevron pattern if I tried to free hand it! : )
ReplyDeleteThat looks so professional, cute cute! Thanks for joining in the party!
ReplyDeleteWow... that looks great! You have such crisp lines, it's hard to tell you painted it. :)
ReplyDelete~Jennifer
www.studiojru.com
u make it look so easy, thanks for the lesson..
ReplyDeleteok, so i am super picky about who i follow...not just everyone, but i am going to follow you. i love your creations! super cute stuff!!
ReplyDeletewww.rachaelsblossoms.blogspot.com
Really Nice! I'd love to fine something to do this on. Love how it turned out!
ReplyDeleteKindly, ldh
Thank you thank you - I think I can do this now! Wish me luck!
ReplyDeleteOMGosh...you make it look so easy! I am totally in love with Mackenzie-Childs Black and White Courtley Check. I would love to find a cute piece of furniture and try this same technique only making squares instead of diamonds. Would it work, ya think?
ReplyDeleteI love your table!!